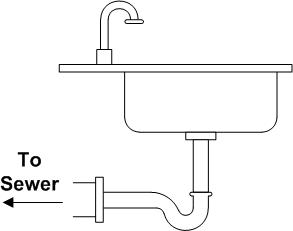
Locate the existing "U" or "P" trap located between the sink tailpipe and the wall sewer pipe
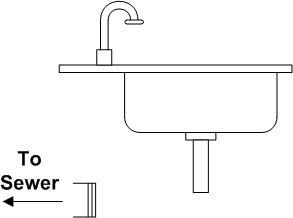
Remove the existing "U" or "P" trap so that the sink tail pipe and the wall sewer pipe are disconnected.
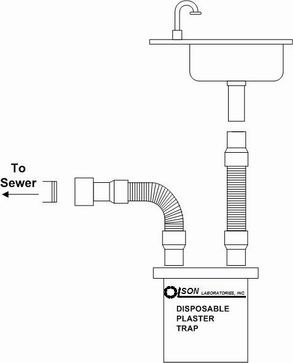
With an appropriate sealing compound, thread-fit the PVC fitting adapter on the sewer pipe to form a sealed connection. Next, slip-fit either end of the other hose over the sink tail pipe. Properly position the disposable container and plug the hose end cuffs into the spout openings. To help stabilize the trap, it may be helpful to partially fill the container with water during the installation process. Be certain the hoses are not constricted or kinked which can interfere with drainage. Upon completion of installation, the hoses should be as vertical as practicable without allowing any dips or sagging to occur. By rotating the fully-connected disposable container, hose positioning can be optimally enhanced to achieve proper vertical slope.
Once installed, check the trap as it becomes full to ensure all connections are sealed. All fittings and hose connections should be checked to ensure a watertight seal. Immediately replace any part in which leakage is detected.
When installed, the Disposable Plaster Trap serves as a settling chamber in which plaster residue in the slurry water discharge is allowed to collect thus reducing discharge into the sanitary sewer.